
A plum grown from a seed is by no means a rarity: this is a common option for getting a fruit-bearing tree. Moreover, a fair portion of the growth in amateur gardens appears due to the fact that ripe fruits that have fallen to the ground are not removed in time. True, on trees grown directly from seeds, one cannot always expect the appearance of fruits as tasty as on the mother: varietal characteristics are rarely transmitted in this way. But if you graft cuttings of the desired variety onto a seedling obtained from a seed, it will be easier, more reliable and cheaper than buying a tree on the market.
Growing plums from seeds is a labor-intensive, but very real process. The first thing you should pay attention to is the type of plum. Then, following our recommendations, you can grow a plum without much effort and in the shortest possible time.
It is possible to grow a plum from a seed yourself, but you must adhere to certain rules. A healthy tree will bear fruit if the variety of the future tree is selected correctly.
Will a plum grown from a seed bear fruit?

Growing plums from seeds is not particularly difficult.
As is the case with most fruit species, after a few years the first flowers and then fruits may appear on the tree. And since seeds are absolutely “waste” material, obtaining seedlings requires almost no material costs.
Moreover, the seed can be immediately planted in the garden where the plum is supposed to be grown. There is a possibility that this will immediately lead to the appearance of a tree.
True, there is also a risk that the bone will be eaten by mice or it will not germinate for other reasons. Therefore, it is safer to carry out the procedure at home, and then transplant the finished tree into the garden.
A plum grown from a seed will definitely bear fruit if the variety turns out to be self-fertile, or if other trees growing nearby act as pollinators.
However, the likelihood that the result of the work will meet the gardener’s expectations is low: instead of a sweet, juicy plum, the tree may end up with small, sour fruits.
Therefore, there is no point in planting seeds of the variety you like: you need to choose those that grew on trees of zoned varieties, unpretentious, resistant to the vagaries of the weather.
Thus, it is more correct to say that it is easy to grow a rootstock from plum seeds, onto which, after a year or, at most, two, plums of the required varieties (not necessarily one!) are grafted.
However, you should not think that such a technique will delay the harvest of the first harvest. On the contrary, on grafted trees the first fruits often appear even faster than on those where no grafting was done.
As an experiment, you can graft varietal cuttings into the crown and leave a couple of side branches intact. However, more often the grafting is done early, in the standard of a one-year-old tree.
Methods for germinating plum pits

1. The simplest way to grow a plum tree is to bury the seed directly into a prepared planting hole in the garden.
True, it is necessary to take measures to repel rodents, for example, bury rags coated with tar nearby.
The planting hole is prepared with dimensions of 50-60 cm in all dimensions; 2 buckets of humus, a glass of superphosphate, and 50 g of potassium sulfate are added to it.
Of course, not every seed will germinate; you need to plant about five at a distance of 8-10 cm from each other:
- The seeds extracted from ripe fruits are washed and, after drying, removed until autumn.
- Prepare the planting hole in advance. You can make a trench in which to plant the seeds 20-25 cm from one another. In this case, the best seedlings are transplanted to a permanent place next year.
- At the end of October, the seeds are planted to a depth of about 8 cm.
- In May, after the emergence of shoots, the weak ones are removed. The rest are looked after: watered, loosened, weeded.
- A year later, in March, a seedling that has grown in a permanent place can be grafted into a standard using cuttings.
- If the seeds were sown in a trench, in April the seedlings are only planted in the pits, and the grafting is postponed for another year. By that time, the tree will already have a crown; you can graft several cuttings, and then collect different varieties of plums from one plant.

2. When planting seeds in the garden, care is minimal, but you have to rely on the mercy of nature and chance, so gardeners prefer to grow seedlings in a pot at home.
In this case, the seeds must be properly prepared for sowing. Without stratification (keeping them in conditions simulating a cold winter), it is almost impossible to germinate them.
They are harvested during harvest, washed and dried, and then proceed as follows:
- At the end of autumn, wrap them one at a time in pieces of natural fabric moistened with water and, putting them in a jar with a loose lid, put them in the refrigerator. There, on a shelf with a temperature of +2...+4°C, they will need to spend 2-3 months.
- All winter they make sure that the fabric does not dry out. The seeds are checked periodically: if mold is detected, they are washed in a pinkish solution of potassium permanganate.
- Towards the end of winter, you can add solutions of growth stimulants - Epin or Zircon - to the water with which the fabric is moistened according to the instructions on the package.
- After stratification, towards the end of winter, the shell of the plum pit cracks, and soon the rudiment of a root appears.
- You don’t have to rush to plant, but the longer the root grows, the more difficult it will be not to break it.
- If the bones are clearly swollen, seem alive, but do not burst, you can help them a little by going through them with a file.
Stratification is carried out not only in tissue: there are other options. Wet sawdust or sand placed in a box is often used; in this case, it is better to use a cellar instead of a refrigerator.

3. There is a more risky method of germination: it requires accuracy, but the time required to awaken a new life is somewhat reduced.
- The seeds can be split with a hammer or tongs and the seeds can be extracted from them.
- It happens that this technique dramatically speeds up the process: keeping the seeds in the refrigerator will only take 2-3 weeks.
- Plant seeds or seeds in pots closer to spring. If by this time the roots have not appeared, such material will have to be thrown away.
Preparing the soil before planting plum pits in a pot
- The sprouted seed is planted in a pot with a volume of 2 liters or more. If you have space in your apartment, an old bucket or pan will do: the more soil there is, the more powerful the roots will grow.
- Place drainage material in a 4-5 cm layer at the bottom of the container: broken bricks, nut shells, etc.
- A thin layer of calcined sand is poured onto it, and then a soil mixture.
- The composition of the mixture must ensure air and moisture permeability. Equal amounts of humus, perlite and leaf soil give good results. You can use turf soil, peat, river sand and other ingredients. Before use, the mixture should be disinfected by spilling a pink solution of potassium permanganate.
Transplanting a sprouted plum pit into a pot

Planting is simple: the seeds are buried in the soil to a depth of about 4 cm and watered. To speed up germination and get a strong seedling, the root is directed downwards.
You can also place 2-3 seeds in a wide pot (after germination, the weak ones are removed by cutting with scissors). The pot is placed in a bright place, the temperature is room temperature. Until the shoots appear, the soil is kept moderately moist, preventing it from souring.
After 2-3 weeks you can expect the emergence of seedlings, although more often this takes a month or a little more. At first they resemble shoots of cucumbers or zucchini, but soon real elliptical leaves form.
Rules for caring for a plum seedling in a pot
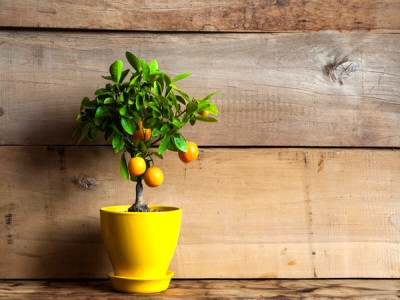
Growing a plum tree in a pot is not difficult.
It requires the following conditions:
- Lighting. The plant should not be exposed to direct sunlight, but a bright place is required. A south-west window sill is optimal.
- Temperature – usual room temperature, 20-25 oC.
- Humidity. Seedlings are watered generously twice a week without creating waterlogging. Air humidity - the higher, the better: household humidifiers are suitable, but in their absence, frequent spraying of the leaves with a spray bottle is required.
- Food. During the summer, the seedlings are fed three times: first with urea, then with complex mineral fertilizer. However, a second feeding may not be necessary.
Under optimal conditions, by the beginning of summer a tree up to 50 cm high can grow. In principle, at this time it is already permissible to transplant it with a lump of earth into open ground, to a permanent place. In regions with mild winters, this can be done in the fall.
Keeping a plum in an apartment until next spring will not be easy: you will have to perform several transplants into larger pots, but sometimes, if growth is slow, you have to take this step.
Transplanting plums into open ground

- A plum tree from a seed is moved into the garden in the usual way, having previously been hardened, i.e., gradually accustomed to changing temperatures.
- The site is chosen in a sunny place, protected from cold winds, the planting hole is prepared in advance.
- Before planting, water the soil in the pot well so that you can get the tree out without destroying the earthen clod.
- It is important to place the root collar 4-5 cm above the ground.
- The tree is watered abundantly; For the first time, it’s a good idea to add Kornevin to the irrigation water.
- In the first 1-2 years of life, drying out of even the surface layer of soil should be excluded.
- If planting is carried out in the fall, for the winter the tree trunk circle is well insulated with coniferous spruce branches, and the crown with burlap.
- The shelter is removed in the spring immediately after the snow cover melts. At the same time, vaccination is carried out.
The main mistakes when growing plums from pits

To get a strong, fruit-bearing plum tree from a seed, little work is required, but it is important to avoid offensive mistakes, in particular:
- When choosing seeds, they are guided not by the taste and grace of the selected fruit, but by ensuring that it grows on a strong tree. It is not worth taking seeds from plums of unknown origin bought at the market. It is better to consult with experienced gardeners from neighboring areas and ask them for a dozen of the ripest fruit varieties recommended for a given region. Also, plum pits can be purchased in our online store.
- You should not try to plant seeds without stratification. Perhaps one in ten will sprout, but it’s easier to keep the seeds in the refrigerator.
- During the stratification process, you should not overdry the seeds: the biological processes in them may stop.
- It is necessary to maintain the optimal depth when planting seeds in a pot.
- When growing seedlings, high air and soil humidity should be maintained, but without overwatering.
Not all mistakes are fatal: if seedlings have appeared, a tree will definitely grow from them, but without creating optimal conditions it is difficult to expect that it will be strong.
Growing a plum from a seed is not difficult, but it requires effort and time. If you do this at home, the plant should not be left unattended for a single day. Therefore, many gardeners take risks by sowing seeds directly in the garden.


Write a comment